Deploying the Interface
Once the interface setup is complete, unplug the interface from your computer and place it in its designated location. You will require a USB power supply (5VDC, 5W) and a power point nearby.
- Avoid placing the interface too close to large metal surfaces or concrete walls
- Where possible, locate the interface close to the access point
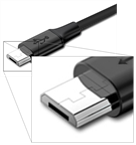
Plug the micro USB connector of the included cable into the interface's USB socket.
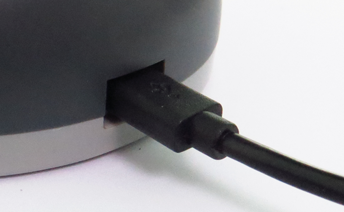
Please note that the wider part of the plug is oriented towards the bottom.
Plug the other end of the cable into the power supply. Alternatively, you can use a power supply with an integrated micro-USB cable.
You will see the following LED sequence:
- All LED's blink simultaneously .
- The red network LED blinks while the interface establishes a connection with the Wireless Network.
- As soon as the Wireless Network connection is established, the red network LED turns on solid. During this period (which, typically, is very short) the interface connects to the cloud server.
- When the connection to the cloud server has been established, the blue network LED blinks.
- The blue network LED turns on solid once the connection to the cloud server is established and the registration details for the interface have been confirmed.
If the blue network LED is not permanently on, you can use the table below or the troubleshooting section to identify the source of the issue.


 …
…

 …
… …
…* Some signals only appear for a very short time, and may not always be observed
The Wireless Interface first negotiates security credentials with the wireless network of the configured SSID.
Once successful, it contacts the network's DHCP server to receive network connection details such as IP address allocation, network mask, gateway and DNS server addresses.
Once these details are received, or if static network address details have been supplied, the interface contacts the LogTag® Online server on port 18888 to authenticate the interface. For this, it checks, if the interface's serial number has been registered against a user in the LogTag® Online database. During this phase the blue network LED blinks. If the interface is found in the database, the blue network LED turns on permanently to indicate it is connected and data can be uploaded.
The server never contacts the interface, so no NAT setup is required. You will need to allow TCP connections to https://logtagonline.com on port 18888 in your firewall.
