Shipment Profiles
A shipment profile is a template that can be used to simplify data entry for individual repeat shipments where a number of entries are common. Parameters you can store include origin, destination, recording and alarm profiles as well as notification recipients and additional information fields.
You can see a list of the current profiles when you click View Profiles from the Shipment profile section on the profile page.

Shipment profile page
You can sort this list by clicking one of the headers in the title row. The list will then be sorted by that column in alphabetical order, indicated by a small arrow that appears next to the header (p). Clicking the column again will reverse the sort order (q). If no arrow is displayed the list appears in the order it was originally entered, with the latest entry on top.
Adding Shipment Profiles
To create a new profile click Create a new Shipment Profile. You will see a new form page where you can enter the details for the new profile.

Shipping Profile.
Following fields can be stored in the profile. For data to be saved, some of the entries are mandatory.
Profile Name (mandatory)
Enter a name for the profile.
Description
Enter a description for the profile.
Shipment Origin (mandatory)
The branch from which the shipment is sent. Select one of the branches from the list1You cannot add new branches from this screen. Branches must be added via the Administration page ..
Shipment Destination (mandatory)
The branch to which the shipment is sent. Select one of the branches from the list1.
Recording profile
Select one of the available recording profiles.
Alarm profile
Select one of the alarm profiles available for the chosen recording profile. Please note that you can only add an alarm profile if you have also selected a recording profile.
Send notifications to these recipients after download
Add the email addresses from as many recipients as you wish. These recipients will be notified when all recorders from a shipment have been downloaded. Separate recipients with a comma, or enter each address on a new line.
Only notify recipients if an alarm is triggered
If you additionally enable this option, an email will only be sent if an alarm was triggered for one of the downloaded recorders.
Use pre-configured Loggers
If you enable this feature, any shipment based on this profile must use pre-configured recorders. The serial numbers of these recorders will be entered via the keyboard or a barcode scanner, rather than configuring the recorders via an interface. You can no longer specify recording and alarm profiles for this shipment.
You should only enable this option when you are using recorders that have been set up for logging by your distributor.
For more details please see Shipments using pre-configured Recorders.
The serial numbers of the recorders will be entered when creating the shipment.
Custom Options
LogTag® Cold Chain Analyzer allows you to add Custom Options fields for each shipment. These fields are not mandatory, can be completed when creating a shipment and are shown on the report when viewing the shipment.
To add an additional information field click Add a new Option. A new line appears where you can add a label for the field and enter text.
Any parameter can be changed when creating a shipment.
When you have completed entering all parameters, click Create Profile. Please note that none of the settings are stored until you click this button. Click Cancel to abort the process without saving any data.
You will now see the page again containing the list with all existing profiles, including the new profile you just added.
The Singapore head office handles several shipments of New Zealand Milk Powder to Shanghai each week.
As the recording and alarm parameters for each shipment are always the same, Aaron decides to set up a shipment template for these shipments.
First, he adds a name and description for the template, so his shippers can identify the template:

He then selects Singapore as the Origin and Shanghai as the Destination:

Milk powder has to be transported in air-conditioned containers, as they have strict temperature and humidity requirements. He therefore selects the HAXO-8 recording and alarm profiles which he has set up beforehand:

Since these shipments are regularly inspected by customs, he decides that notifications should be sent to the branch manager in Shanghai, Melissa Chan as well as the QA department:

Aaron then adds additional information fields that he wants his shippers to enter, such as airway bills, name of the ship and estimated arrival time in Shanghai.

He finishes by creating the profile .
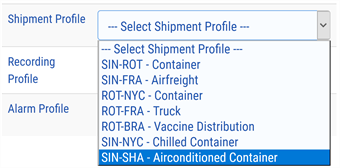
Now, everytime one of the shippers creates a new shipment of milk powder from Singapore to Shanghai, all they need to do is select this template:
As a result, most of the fields in the new shipment form will already be pre-filled:

Editing a Shipment Profile
Each profile can be edited or deleted. To edit a profile, click Edit from the Actions column. You can now change or amend each field in the same way as you did when the profile was created. When you have finished editing the profile, click Save Changes.
Deleting a Shipment Profile
You can delete a profile by clicking Delete from the Action column. Deleted profiles cannot be recovered. You will be asked to confirm that you wish to delete the profile.